Channel without transcoding
Create a channel with the following parameters: no transcoding, no archive, only Live.
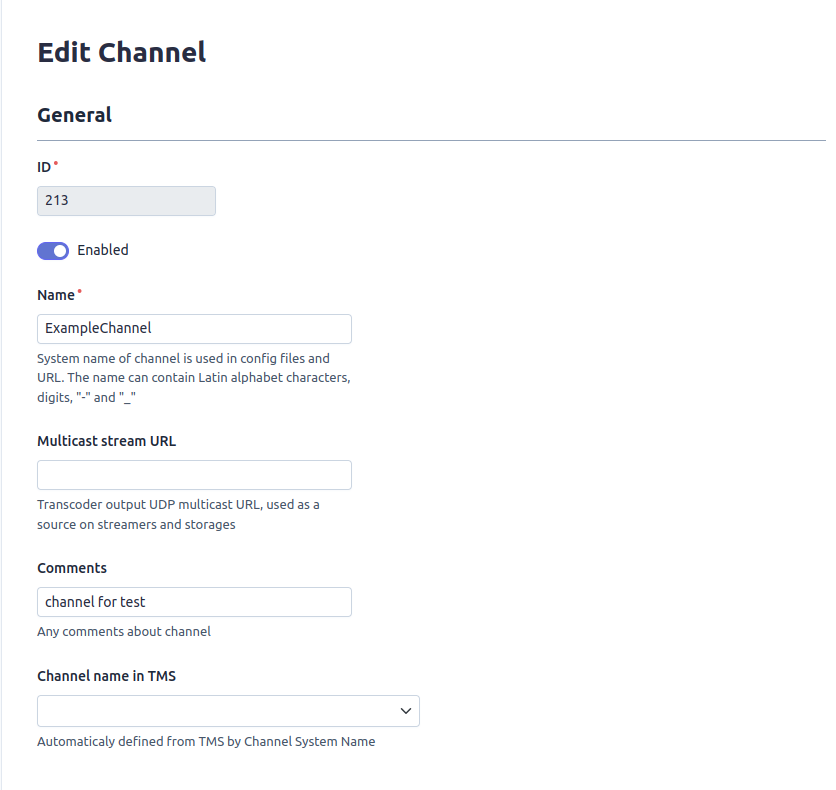
Choose create a new channel, specify the system name. Do not fill in the Multicast stream URL parameter, as there is no need to send the stream to multicast in our task, let’s add comment with information about the channel. The ID field is set automatically.
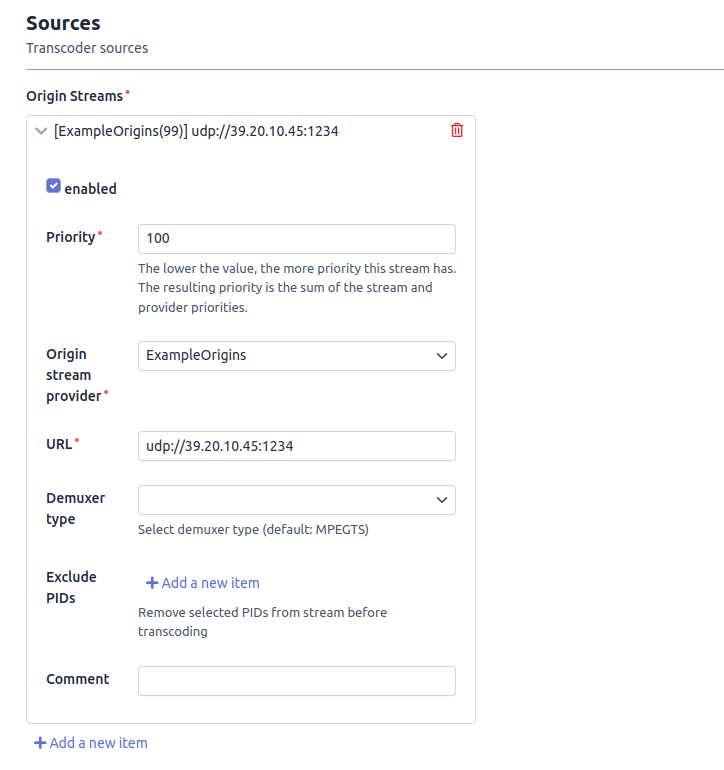
In the Sources section, select Original stream provider from the drop-down list, add the URL of the incoming stream, and leave the Demuxer type blank.
Do not fill in the Transcoder settings section as Mira Reader is used.
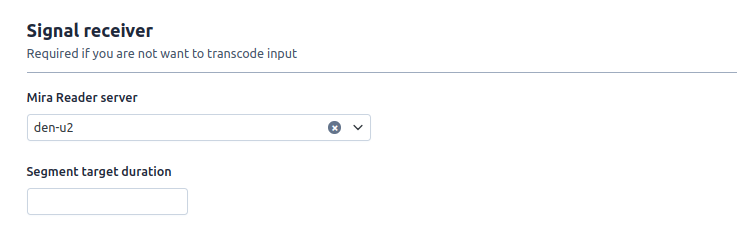
In Signal receiver select the receiver from the drop-down list, the Segment target duration field should not be filled in, the default value of 10 seconds is suitable for us.
In DVR settings select Storage Node, priority and archive depth.

Path is selected based on our requirements, let’s go back to Mira Storage and see its settings:
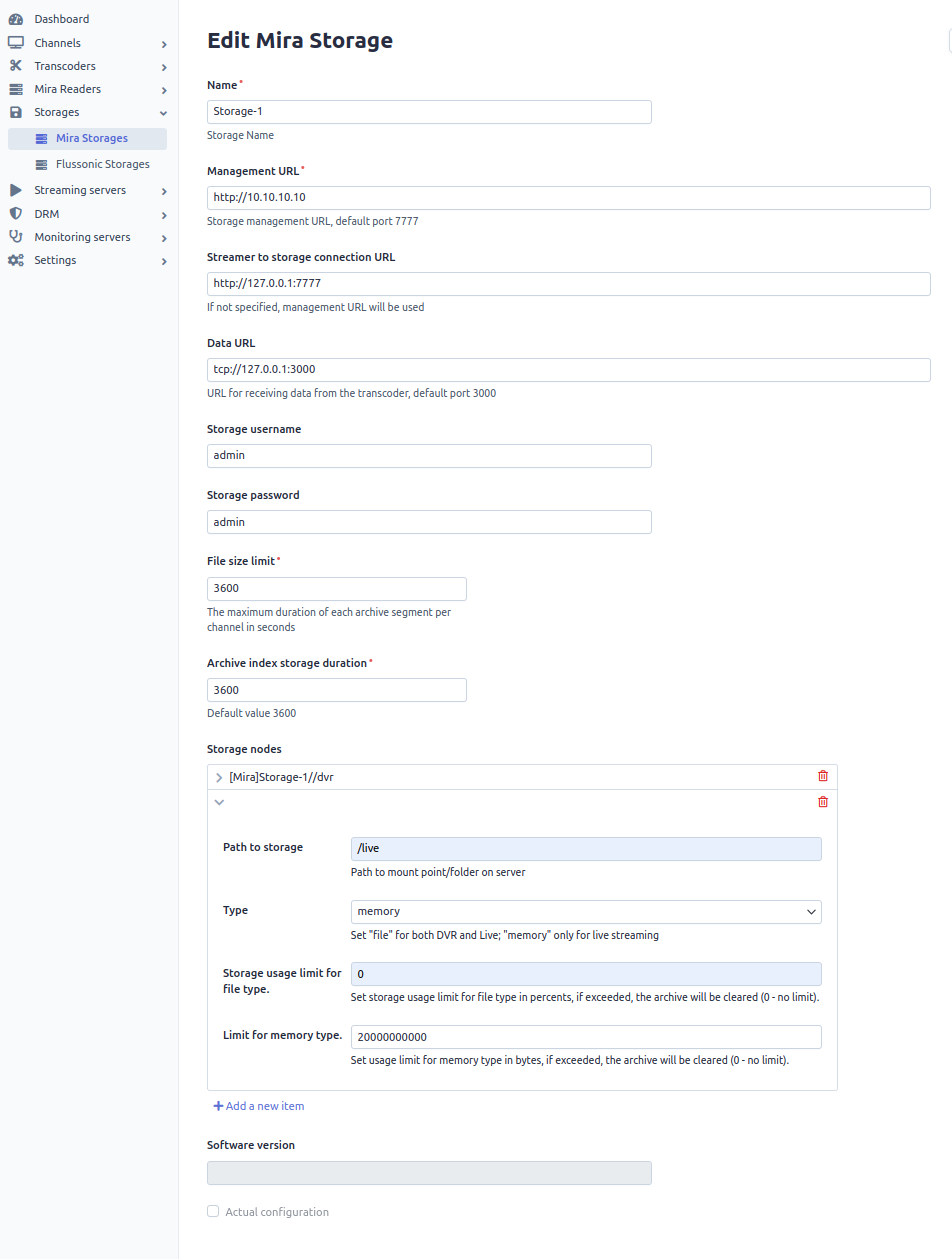
In Storage node [Mira]Storage-1//live, the memory write type is selected since we want to write to RAM and a 20GB RAM usage limit is specified.
In our example, Mira Reader, Mira Streamer and Mira Storage are installed on the same server, so we specify the local address in the Streamer to storage connection and in the Data URL.
Since we need only DVR, the node with writing to file is selected. The file utilization limit is 95%, after reaching this value files will be overwritten. Limit for memory type is 0, because the File type will not use RAM.
In Streamer settings you need to select the streamer to use and specify its priority:

After saving the channel, you need to apply all the settings.
If all settings have been entered correctly, the status will change to Applied and the channel statistics will be displayed.